
OTWONO LABS / NOTEBOOK
Visual design: help a reader know where to look and what to do
Learn one step at a time, with examples, practice and a place for your questions.
Start this lessonPractical communication · LESSON 4 OF 4
Arrange a small information card so its subject, useful details and next action are easy to identify.
Before you start: Read a short card. You can sketch with boxes and words; artistic drawing skill is unnecessary.
Suggested pace: 20 to 35 minutes, with extra time for practice. You can stop after any section and return.
Start with something concrete
A lesson card needs to answer three questions: What is this lesson? Does it suit me? How do I start? When every detail is equally large and bright, the reader may have no clear starting point. Design should reveal the information structure.
The words we will use
- Hierarchy
- Different levels of emphasis that show what matters first.
- Grouping
- Placing related information together to show its relationship.
- Action label
- Words that explain what a control does.
- State
- The current condition of something, such as available or unavailable.
Understand the idea
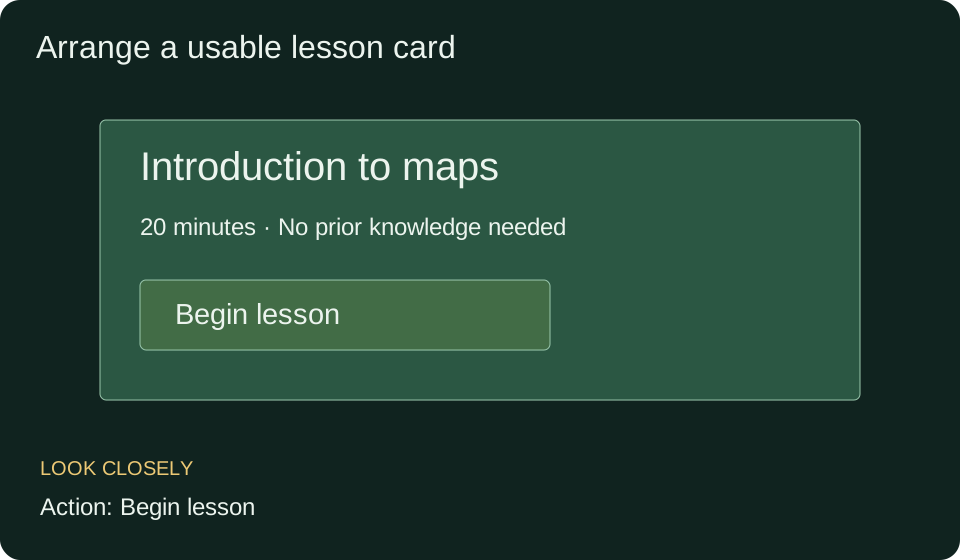
Give the subject a clear heading. Group duration and prerequisite information together because both help a reader judge suitability. Put the next action in a distinct, consistently styled area.
Use spacing as well as size. Details close to their heading look related; unrelated groups need separation. A small set of repeatable styles is often easier to interpret than a different treatment for every line.
Labels must match behavior. If a button starts a lesson, Begin lesson is meaningful. If the lesson is unavailable, do not display the same active action as if it works. Communicate the actual state and a truthful next option.
Teacher example: arrange a beginner lesson card
- Use Introduction to maps as the subject heading.
- Group 20 minutes and No prior knowledge needed as supporting details.
- Label the action Begin lesson.
- Ask a reader to identify the topic, prerequisite and next step. Their answers test whether the arrangement works.
Connect the example to the rule
Do not rely on color alone for important meaning. A status should also say Completed or Not completed, for example. On smaller screens, stack related groups in a sensible order rather than shrinking all text. A design still needs separate accessibility and interaction checks in its real implementation.
Your turn, with support
The lesson is not ready to open. What should replace an active Begin lesson action?
Show one hint
Tell the reader the real state rather than inviting an action that fails.
Compare your working
Show an accurate unavailable state and a useful next option, such as returning to available lessons. Only offer notification signup if that feature actually exists.
A mistake worth understanding
A green square without a label assumes the reader can perceive the color and knows what it means. Add explicit wording. Color can reinforce meaning but should not carry the entire explanation.
Check the idea before moving on
The interactive questions load when JavaScript is available. You can still use all written practice below.
Now solve without the example
- Name the three groups on the example card.
- Write a status label for a saved but unpublished item.
- Propose a concrete question to test whether your layout is understandable.
Check the independent answers
- Subject, supporting details and action.
- Draft, with an explanation that it has not been published where needed.
- Ask the reader how to start, or whether prior knowledge is required. Observe whether they find the right information.
Use it in a new situation
Adapt the same lesson information for a printed flyer. What interaction assumption changes?
Compare a possible solution
A printed button cannot start the lesson. Give an appropriate address or clearly explained access method instead while preserving the subject and details.
What to take away
Choose the reader’s task, group related information, give meaningful emphasis and check whether the reader understands the next action.
Before your next lesson
Close this page and explain the main idea in your own words. Rework one of the independent problems without looking. If a step is still unclear, return to the worked example and compare that exact step. Tomorrow, try the transfer problem again before opening its answer.
For a saved introductory check, open this lesson in your signed in workspace and choose Tests. Practice choices on this page are not a qualification or a substitute for independent work.
You reached the end of this introductory path. Browse another subject or revisit a lesson that needs more practice.